
Eccomi qui =)
Un altro “lavoro” particolare. Tempo fa vendevano alle edicole i personaggi della Marvel e della DC dipinti “a mano” =(
Ho acquistato diversi personaggi di questa iniziativa editoriale per poi , un giorno, ridipingerli…e dare una mia versione dei personaggi.
Ho ripulito il modello dal suo colore e liberato da imperfezioni.
Anche questa volta ho usato i 3 Tipi di Primer della ditta Vallejo ( Grigio, Bianco e Nero) per ottenere il primo effetto di chiaroscuro.
Here I am =)
Another particular “work”. Long time ago in the newsstand sold Marvel’s and DC’s chatacters painted “by hand” =(
I bought several characters of this editorial move to repaint them (maybe….one day) and to give them my personal version.
I cleaned up the model from his color and freed it by imperfections.
Once again I used the Vallejo’s 3 Types of Primer (Grey, White and Black) to obtain the first effect of chiaroscuro.


Dopo questo passaggio ho fatto delle ricerche sui colori da usare…
After this stage I did some research on the colors to use…

Sono tutti colori Vallejo Model color e Vallejo Model air…
Come base ho usato il colore 71.083 Orange Val diluito in proporzione 2 Acqua/1 Orange applicandolo ad aerografo.
Come potete notare le sfumature date in precedenza con i tre primer hanno fatto il loro effetto.
They are all colors Vallejo Model color and Vallejo Model air…
As a base I used the 71.083 Orange color Val well diluted in proportion 2 Water /1 Orange and applied it by airbrush.
As you can notice the tones given before with the three primers have made their effect.


Ora si procede a dipingere a pennello ogni porzione di pietra che forma la pelle del nostro eroe…
Ho usato i seguenti colori:
71040 Burnt Umber Val Model Air
71083 Orange Val Model Air
71002 Medium Yellow Val Model Air
71074 Radome Tan Val Model Air
Tutti i colori sono stati ulteriormente diluiti per poter applicare dei leggeri e trasparenti strati di colore per poter seguire il gioco di ombre precedentemente ottenuto.
Il 71074 è stato applicato in sottili linee per evidenziare i colpi di luce.
Now shall we start to paint with a brush every portion of stone that forms the skin of our hero…
I used the following colors:
71040 Burnt Umber Val Model Air
71083 Orange Val Model Air
71002 Medium Yellow Val Model Air
71074 Radome Tan Val Model Air
All the colors have subsequently been diluted. In this way I could apply some light and transparent color’s layers to follow the shades’ game previously gotten.
The color 71074 has been applied in thin lines for underlining the strokes of light.


Ed ora passiamo ai pantaloncini…
Prima ho steso uno strato di Humbrol Maskol (un liquido che una volta asciugato diventa gomma) su gambe, torso e braccia per non rovinare il lavoro fatto sulla “pelle”.
Ho usato il colore 71087 Steel Blue Model Air Vallejo applicato ad aerografo.
Ho usato il colore 70839 Ultramarie Model Color Vallejo molto diluito (1 Ul/ 3 Acqua) per creare le zone più luminose. Poi ho usato il colore 70902 Azure Model Color Vallejo ed il colore Space Wolves Grey Citadel per creare i colpi di luce.
And now we pass to the shorts…
First of all I lied a layer of Humbrol Maskol (a liquid that once dry it becomes gum) on legs, torso and arms to not ruin the job done on the “skin”.
I used the color 71087 Steel Blue Model Air Vallejo applied it by airbrush.
I used the color 70839 Ultramaries Model Color Vallejo well diluted (1 Ul / 3 Water) to create the brightest zones. Then I used the color 70902 Azure Model Color Vallejo and the color Space Wolves Grey Citadel to create the strokes of light.


Ed ora passiamo alla sua base…
Ho ricoperto i piedi con Humbrol Maskol per protezione.
Dopo aver colorato la superficie con il colore 70862 Black Grey Vallejo ho incollato 2 pellicole per mascherature per formare una striscia ad aerografo.
Ho colorato l’interno con un Primer Grigio e poi ho steso un normale colore Bianco per simulare le strisce stradali.
And we now pass to his base…
I covered the feet with Humbrol Maskol for protection.
After having color the surface with the color 70862 Black Grey Vallejo I glued 2 masking film to form a strip by to airbrush.
I colored the inside with a Primer Grey and then I lied a normal White color to simulate the road stripes.
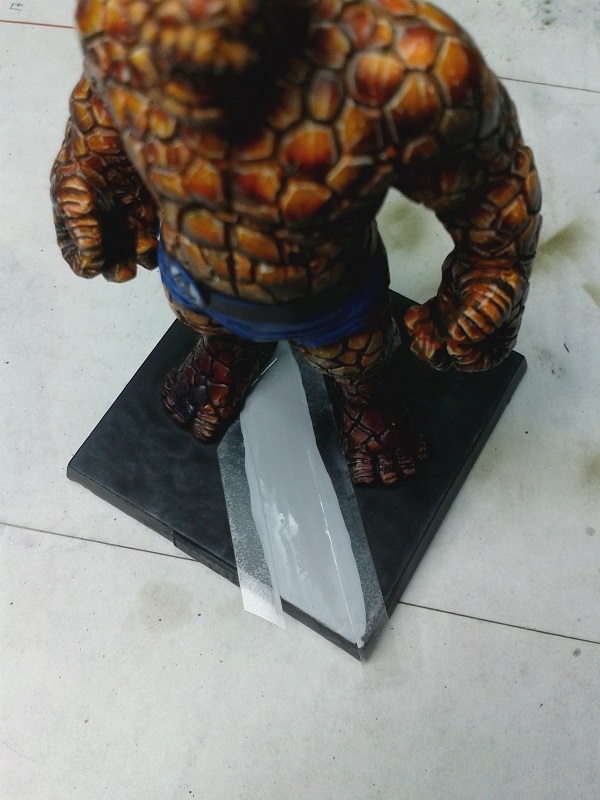
Ho usato un colore nero molto diluito ed ho creato delle “ragnatele” per simulare l’effetto di asfalto “spaccato”.
Ho aggiunto una piccola porzione di colore grigio neutro al colore Dark Grey e con miscela diluita ho dipinto i pezzi di asfalto.
Ho aggiunto ancora del grigio alla miscela ed ho schiarito ancora i pezzi . Poi ho usato il colore 70907 Pale Greyblue Model Color Vallejo per dare più risalto ai bordi .
I used a black color well diluted and I created some cobwebs to simulate the effect of “broken” asphalt.
I added a small portion of neutral grey color to the color Dark Grey and with diluted mixture I painted the pieces of asphalt.
Again, I added the grey color to the mixture and I made lighter the pieces. Then I used the color 70907 Shovels Greyblue Model Color Vallejo to give more prominence to the edges.


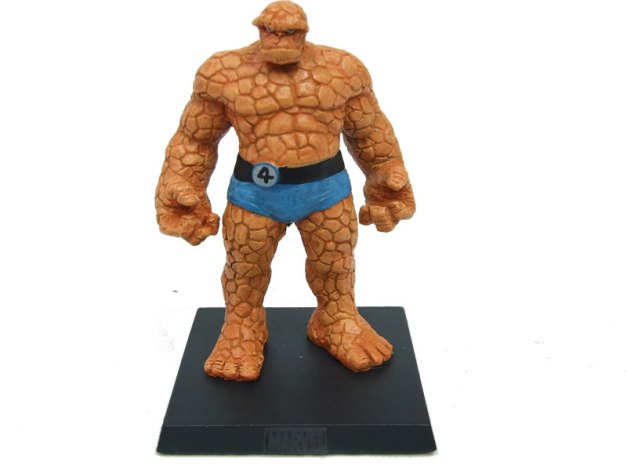
Ed ecco il lavoro finito.
Spero che vi piaccia! =)
And here the ended job.
I hope you like it! =)


